The Fluffy Brow Obsession: Get the Salon Look at Home
The Brow Lamination trend is here to stay. That perfectly brushed-up, fluffy, and feathery look transforms your face, making your eyes look wider and your brows instantly fuller. While a professional lamination can cost up to £70 and require a salon trip every 6–8 weeks, the Sassy Saints Brow Lamination Kit makes this sought-after look an easy, affordable, and safe DIY treatment.
This comprehensive guide will walk you through the process, ensuring you get flawless, long-lasting results.
Section 1: Pre-Treatment Preparation and Safety
Your safety is paramount. Always perform a patch test 24–48 hours before the full treatment by applying a tiny bit of the lifting and setting lotions behind your ear or on your inner arm.
What You’ll Need:
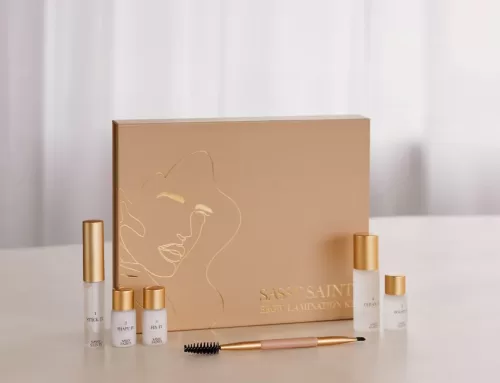
- Sassy Saints Brow Lamination Kit [Affiliate Link]
- Cotton pads and Q-tips
- Petroleum jelly (optional, for skin protection)
- Cling film (plastic wrap)
Key Prep Steps:
- Cleanse: Ensure your brows are completely clean and free of any makeup, oil, or residue. Use a non-oily cleanser.
- Protect: Apply a thin layer of petroleum jelly around the entire perimeter of your brows to protect the surrounding skin from the chemical solutions.
Section 2: The Lamination Tutorial—Step-by-Step
Follow these steps carefully for that perfect, long-lasting laminated look.
Step 1: The Lift (Perm Solution)
- Using a clean applicator wand (or the supplied brush), apply a thin, even layer of Perm Solution (Lifting Cream) over your entire brow, ensuring all hairs are fully coated.
- Immediately use a spoolie to brush your brow hairs into the desired “laminated” shape—usually straight up and slightly angled toward the tail.
- Cover the brows completely with small strips of cling film. This creates heat to help the solution penetrate the hair shaft.
- Processing Time: Follow the timing instructions precisely. Do not leave the solution on for too long, or it can damage the hairs. (Typically 5–8 minutes, depending on hair thickness).
- Remove the cling film and wipe off the entire Perm Solution thoroughly with a dry cotton pad.
Step 2: The Set (Fixing Solution)
- Re-brush your brows into your desired shape again, ensuring they are perfectly positioned.
- Apply the Fixing Solution (Neutralizing Cream) over the hairs, covering the same area as the perm solution.
- Cover the brows with new strips of cling film.
- Processing Time: Process for the same amount of time as the Perm Solution. The Fixing Solution locks the brow hairs into their new shape.
- Remove the cling film and wipe off the Fixing Solution completely.
Step 3: The Nourish (Keratin Boost)
- Using a clean spoolie, apply the Nourishing Oil (Keratin Treatment) liberally over your freshly laminated brows. This solution rehydrates the hairs, restores moisture, and seals the cuticle, preventing breakage.
- Leave this solution on for at least an hour, or overnight for maximum conditioning. Do not rinse it off immediately.
Section 3: Aftercare and Troubleshooting
- Immediate Aftercare (24 hours):
- Do not get your brows wet (no showers, steam, or sweating).
- Do not apply any brow makeup.
- Do not sleep on your stomach or sides.
- Long-Term Aftercare: Keep brows hydrated with a non-oily conditioner or the Sassy Saints Keratin Boost once or twice a week.
- Lasting Power: Your beautifully laminated brows should last approximately 4–6 weeks. Wait at least 6 weeks before performing the lamination again.
Conclusion: Fluffy Brows Made Easy
The Sassy Saints Brow Lamination Kit is your ticket to effortlessly chic, perfectly styled brows without the recurring salon cost. It’s safe, professional-grade, and gives you the power to control your look.
💖 Get the full, fluffy brow look today! Purchase your Sassy Saints Brow Lamination Kit here. Get Now